Planned Maintenance Work Orders (PPMs)
Planned Maintenance Work Orders are initially defined as a Standard Job.
The Standard Jobs are then attached to Assets to create Planned Maintenance Schedules which in turn create the Work Order for specified cycles.
For details of how to define a Standard Job, please refer to the Work Order Standard Jobs section of this document.
PPM Schedules >> PPM Schedules
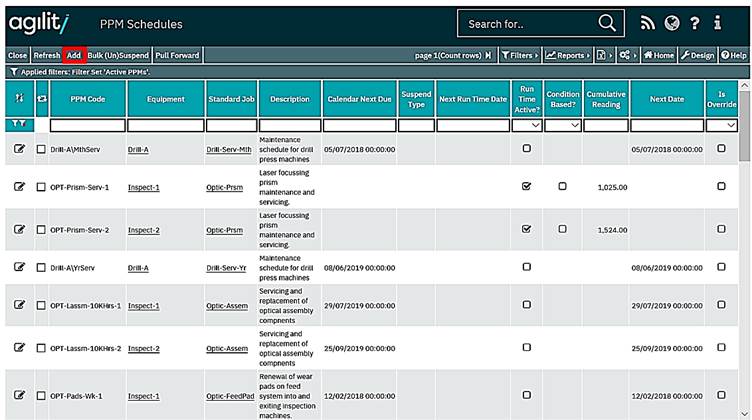
To create a PPM schedule, click on Add from the PPM Schedules Scan Form.
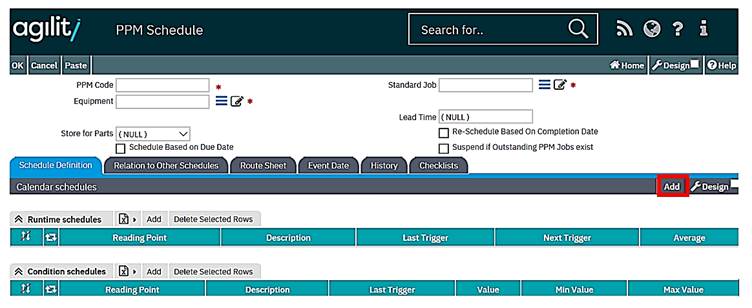
PPM Code
A unique identifier for the PPM Schedule; this could be made up as a combination of the EQUIPMENT CODE and the STANDARD JOB CODE.
This combination will only appear once in the PPM Schedule file and is thus Unique.
Equipment
This can be selected from the Equipment help scan or it can be input manually. This is a mandatory field.
Work Orders cannot be created for equipment Items that have been taken out of service and have been flagged as obsolete
Standard Job
This is the code of the Standard Job that is to be scheduled.
Lead Time
The Lead Time (if any) affects the Created Date of the Work Order.
If no Lead time is specified, then the Work Order Creation date will be the same as the Start Date, ie the Work Order will be generated on the date that the Work Order is due to start.
Recording a value in this field will allow for a work order to be created a number of days in advance of it being due to be started.
In this way the PPM workload for say 2 weeks’ time can be known.
Store for Parts.
This field indicates which Inventory Store Location holds any of the parts or Kits that may possibly be used when carrying out this PPM.
Schedule based on Completion Date
This option is an extension to the “Suspend if Outstanding Jobs exist” option.
When the flag is checked, the job will not be generated when there are any outstanding jobs generated from this PPM and after all those jobs are completed or cancelled, the next event date for the PPM will be set by adding a number of days specified in the schedule definition to the completion/cancellation date of the job which has been completed or cancelled last
Schedule based on Due Date
If this check box is selected, then PPM Work Orders will be generated so that the work order Due Date is constrained by the schedule definition.
For instance, if the schedule is set to run on the 1st March every year, then the PPM Work order will be generated with a Start Date of 1st March. However, if the Schedule Based on Due Date flag is ticked, then the Work Order will be generated with a due date of 1st March.
Suspend if Outstanding Jobs exist
In some cases, it’s not expected that the job is generated based on the defined schedule if there is already a job on the system generated from the same PPM job which has not yet been completed.
This can be accomplished by setting this flag to “checked”.
In this case, when the job is due to be generated based on the schedule definition there are any outstanding jobs generated from the same PPM, the next job will be generated but the next event date will be recalculated according to the plan.
An appropriate message will be added to schedule history.
Any Work Order contains three important date values:
Created Date The Work Order record was created on the system
Start Date The date that Work should begin
Due Date The date that the Work Order should be completed
When creating a PPM Schedule, the Due Date is calculated based upon the Priority defined in the Standard Job. Therefore, the Schedule definition dictates the Start Date of a Work Order.
Valid From
Enter the start date of this schedule. This is an optional date however if completed the Valid To date should also be completed. The completion of these 2 dates gives the PPM Schedule a “Finite” live.
Valid To
Enter the date that this schedule will cease to be used. This is an optional date however if completed the Valid From date should also be completed.
The completion of these 2 dates gives the PPM Schedule a “Finite” live.
Suspend Start
If the schedule is to be suspended for a period of time within the valid dates then use this field to enter the start date of the suspension period.
This is an optional field, however if completed the “Suspend End” should also be completed.
Suspend End
Enter the final date of the suspension period. This is an optional field, however if completed the “Suspend Start” should also be completed.
Suspend Type
Use the dropdown list to select the type of suspend that is taking place. The options in the displayed list can be adjusted through Dictionary File Maintenance.
Next Event Date
The first time the schedule is set up enter the date that should be used as a starting point to calculate the work order generation dates. This field must be populated.
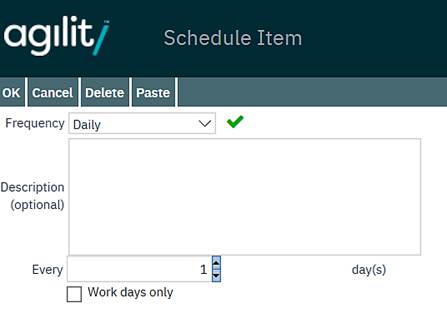
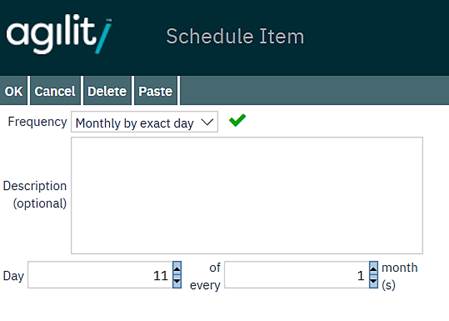
Frequency
Select the cycle frequency from the drop down list. Once selected, the form will be updated to show the required fields for this cycle period.
Scheduling Examples;
• Every Working Day:
• Every month on the 11th for the next 12 months:
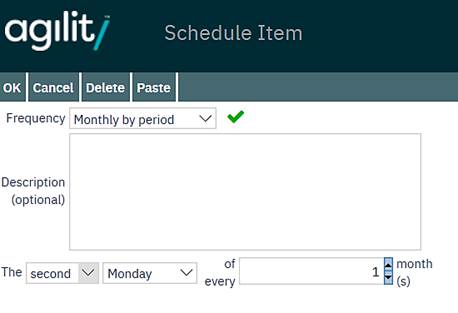
• Every second Monday of the month:
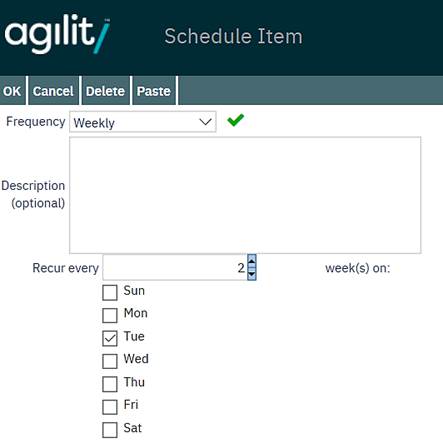
• Fortnightly on a Tuesday:
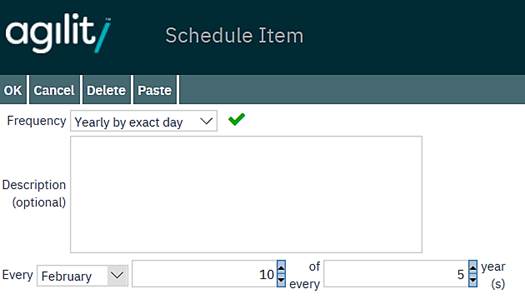
• Every February 10th every 5 years:
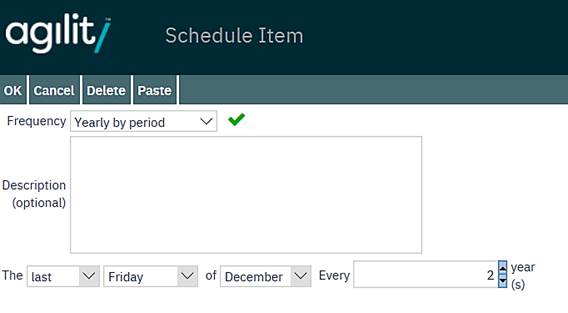
• Every other year on the last Friday in December:
On any of the above frequency screens it is possible to “Set Maximum Occurrences”, this has the effect of giving the PPM Schedule a “finite” Life.
For example if a job that has a Frequency of every 3 months is given a Maximum Occurrence of 8 then it will be valid for only 2 years.