Calendars
Different calendar scenarios can be set up detailing, for example, monthly, quarterly or yearly calendars. The calendar is required when completing Work Orders where there are elements of costing information (i.e. Labour Hours / Rates, Materials, Other Costs).
A calendar is made up of periods that detail an end date and optionally working days and hours. It is advisable to have only one calendar in the system and to add new periods when required. If a calendar period does not exist i.e. it has expired, when completing Work Orders with attached costs, then completion cannot take place.
Accessed from Standing Data >> System >> Calendars

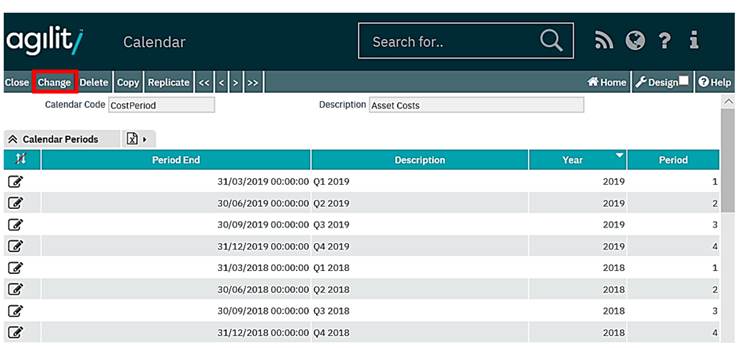
Click on the magnifying glass icon to the left of an existing definition to view the calendar detail this will provide a scan view of all the periods configured against the selected calendar.

To create a new period within the existing calendar, click change on the screen above.

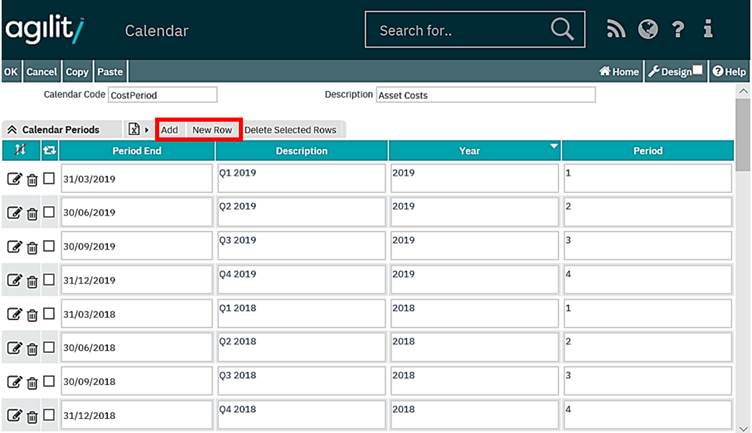
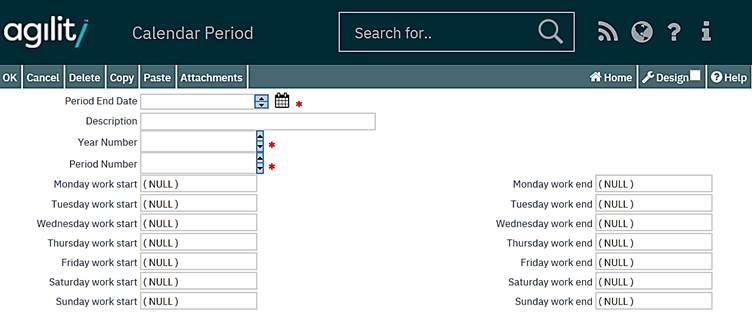
The “Add” and “New Row” buttons will appear at the top right, if you click “Add”, the following screen will appear, and allows for the specification of Working Hours along with the calendar periods. If you click “New Row”, you won’t initially be able to define the Working Hours.

Period End Date
Select from Calendar option can be chosen
Description
This is a free text field used to describe the period.
Year Number
The Year for which the calendar is valid
Period Number
This depends on how the year is to be split and indicates the order of the period within the year.
For example;
If the year 2019 was split quarterly typical entries would be;
Period End Date
1 31/03/2019
2 30/06/2019
3 30/09/2019
4 31/12/2019
It is also possible to indicate the hours of work for each day in the week during the defined period. This information is used when calculating, in conjunction with Priority Codes, the due date of a Work Order.
Each calendar can have a number of exceptions defined for which different working hours can be specified. When such a calendar is linked with the priority record, the exceptions information will be taken into account when the Work Order due date is calculated by the system according to the selected priority.
To add a new exception to the calendar, click new row button in the Exceptions grid whilst in period change mode:

Enter the date for the day you want to exclude.
A start and end time can also be specified for the excluded day.
A description field is also available which can be used to store details about the exception, for example ‘Public Holiday’.
If the start and end time values are left as null, the system will interpret them in the following way;
Not Available from: will be recognised as 00:00 (The first minute of the day)
Not Available to: will be recognised as 23:59 (The last minute of the day)