Service Contract Detail
Service Contracts >> Add a New Contract
Service Contracts >> Contract List >> Detail Drill down
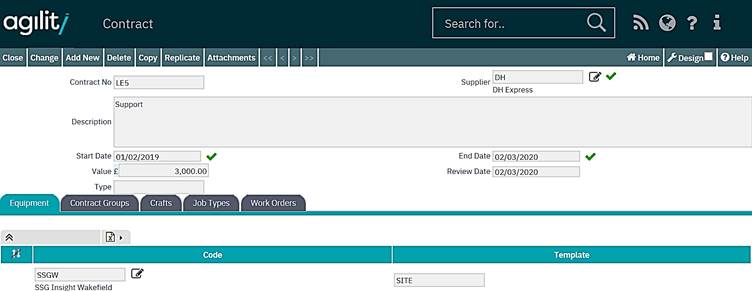
The detail form is used for adding, editing and deleting the contract details.
The contract has to be associated with a provider that has been configured in the system as a service supplier prior to the contract being added.
Each time a work order is raised against one of the assets listed or raised against an asset that is a member of one of the groups listed on the contract then the contract details on the work order will be automatically populated with the details of the current contract.
To add new contract details please select ‘Add a New Contract’ from the menu or use the ‘Add’ option from the menu bar of the service contract detail form.
Field Definitions;
Contract Number
The contract number can either be entered manually or generated by the system automatically.
The use of automatic generation is controlled by a record in sequence definitions. (Please refer to the system configuration chapter for more information on sequences.)
If a definition exists with a code of ‘cmContract.ContractNumber’ then the contract number will be automatically generated when adding a new contract using formatting details specified on the sequence definition.
If this definition does not exist then the number can be entered manually.
Supplier
This is the code of the service/contract supplier as configured in suppliers.
Description (optional but recommended)
Free text description used for storing details about the contract.
Value (optional)
The overall value of the defined contract
Start Date and End Date
This is the date period that the defined contract covers
Review date (optional)
The date which the contract is to be reviewed, i.e. for renewal
Type (optional)
Free text to define the type of contract for organisational and reporting purposes, i.e. if this is a service contract or a maintenance contract.
Tabs
Each tab contains a grid listing a different associated element of the contract.
The items in the equipment, contract groups, crafts and job type tabs can be added and removed by using the new, delete and select from list option available on each grid within each tab.
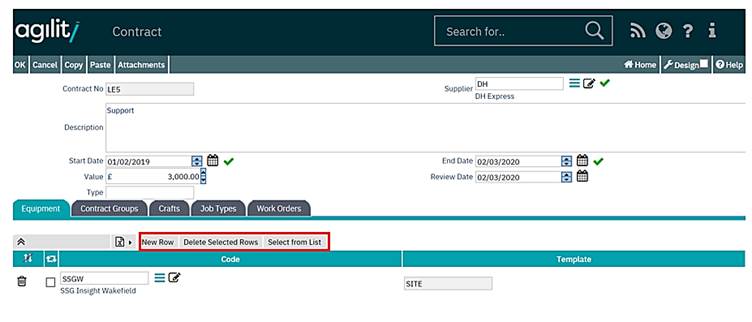
Equipment
This tab contains a grid listing the equipment items that are associated with this contract.
Contract Groups
This tab contains a grid listing the equipment groups that are associated with this contract.
Crafts
This tab contains details on the associated crafts. If a contract has craft associations then only these crafts listed are covered by this contract on the work order.
If no craft restriction applies then the list should remain empty.
Job Types
This tab contains details on job types which have been associated with the contract.
Work orders
This tab contains an in-line grid version of the contract work orders scan form which has been pre-filtered on the current contract for open work orders.
This provides a list of work orders that have been raised against this contract and from which work orders details can be viewed.
Attachments
Files can be attached to and stored with the contract. Attached files can also be automatically printed with any work order raised against the contract.
To add or maintain attached files click the ‘attachments’ option on the menu bar, this will open an attachments grid.

This can be used to store copies of any agreements, a copy of the contract, instructions specific to the contract or any other associated documents or files.

To auto print a document with a raised work order then ensure that the ‘auto print’ option is checked.
Other Functions
Editing a contract
From within the detail form click the change option on the menu bar to change the current contract details.
Deleting a contract
If the contract has not been used on any work orders then the contract details can be deleted by clicking on the ‘delete’ option on the menu bar.